

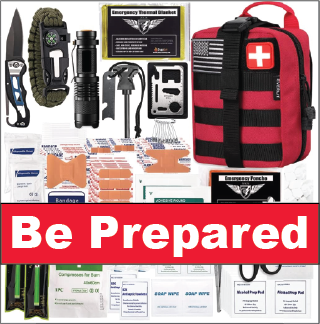
When most people imagine an emergency preparedness bag, they picture something right out of a survival show — tactical gear, expensive flashlights, and high-end gadgets. But here’s the truth: you don’t need fancy equipment to be ready. In fact, your home probably already has most of what you need.
The goal isn’t perfection — it’s practicality. A well-prepared bag is about function, not flash. Let’s break down how to build one affordably using common household items.
1. Start With What You Already Have
Before spending a dime, take inventory. Old backpack? Perfect. Half-used first-aid kit? Great start. The key is to use what’s available and build from there. You don’t need specialized “survival” versions of everyday supplies — just reliable ones you already trust.
Gather your basics: sturdy shoes, spare clothes, a flashlight, water bottles, and a few days of non-perishable food. You’ll be surprised how much is already within reach.
2. Your Medicine Cabinet Is a Goldmine
A well-stocked medicine cabinet can provide most of your first-aid essentials. These are the items to pull first:
First Aid Essentials
- Adhesive bandages of various sizes
- Antiseptic wipes or hydrogen peroxide
- Gauze and medical tape
- Tweezers and small scissors
- Pain relievers like ibuprofen or acetaminophen
- Allergy medication or antihistamines
- Lip balm (great for dry skin or chapped hands)
- Cough drops or lozenges
- A few days’ supply of prescription medications
- Small hand sanitizer or alcohol wipes
Pro tip: Repackage bulky supplies into smaller, resealable plastic bags to save space.
3. Everyday Items That Double as Survival Tools
You don’t need to buy everything labeled “emergency-grade.” Many household items work just as well.
Dual-Purpose Home Essentials
- Plastic grocery bags: waterproof storage or makeshift ponchos
- Duct tape: fixes torn gear, seals leaks, even patches clothing
- Old T-shirts: use as bandages, towels, or cleaning cloths
- Ziploc bags: keep small items dry and organized
- Whistle: signal for help if you’re trapped or need attention
- Flashlight: any working light source beats being in the dark
- Matches or lighter: essential for warmth and cooking
- Old phone charger or battery pack: power when the grid goes down
If you have camping gear, toss in a small stove, pot, or utensils — they’re perfect for an emergency setup.
4. Food and Water: Keep It Simple
You don’t need pricey survival rations. Look for shelf-stable foods you already enjoy.

Food & Water Basics
- Bottled water or reusable containers (1 gallon per person per day)
- Granola bars, nuts, and trail mix
- Canned goods with pull tabs (soups, beans, tuna)
- Peanut butter or nut butter packets
- Instant coffee, tea, or electrolyte drink mix
- Manual can opener
Rotate your food every six months to keep it fresh.
5. Add a Few Comfort Items
Emergencies are stressful. A few small comforts can make all the difference.
Personal Comforts
- Wet wipes or travel-size soap
- Extra socks and undergarments
- Small towel or blanket
- Toothbrush and toothpaste
- Deck of cards or a small book
- Copies of IDs and emergency contacts in a waterproof sleeve
Comfort equals calm — and calm keeps you focused.
6. Pack, Label, and Store Smart
Once you’ve gathered everything, pack it in a sturdy backpack or duffel. Keep it somewhere accessible — near the front door, in a closet, or in your car trunk.
Label it clearly and set a reminder to check it twice a year for expired supplies.
7. The Bottom Line
Prepping your emergency bag doesn’t mean emptying your wallet. It’s about being resourceful, not reckless. Everyday items can be lifesavers when organized with purpose.
Start small, use what you have, and add to your bag over time. Being prepared doesn’t have to be expensive — it just has to be done.
